Custom game show buttons / 11-09-2024
My dad is turning 50 this year, and my mom and her friend came up with a cool idea. Since we are inviting all of his close friends and family, they thought we could make a game show-style quiz with prizes about my dad. Naturally, they asked me if it was possible to do something cool like that, and I said yes, I could make these game show-style buttons for them. So now I have to figure out how to do that. The Idea
My brain started thinking of many different possibilities for making it work. Luckily, I had recently acquired a 3D printer, so I knew how to make some nice shells. Now I had to figure out how to make 3 or more buttons that can communicate with a single device, hopefully with equal speed. The Different Ideas
In the beginning, I came up with these four ideas:
I thought about it and found drawbacks for all of the ideas:
In the end, I went with the last idea as I saw that it had the fewest drawbacks. I also decided that since all of the input went to the master at the same time, I could use a Raspberry Pi with a web server or a simple app on my PC that detects and processes who was first.
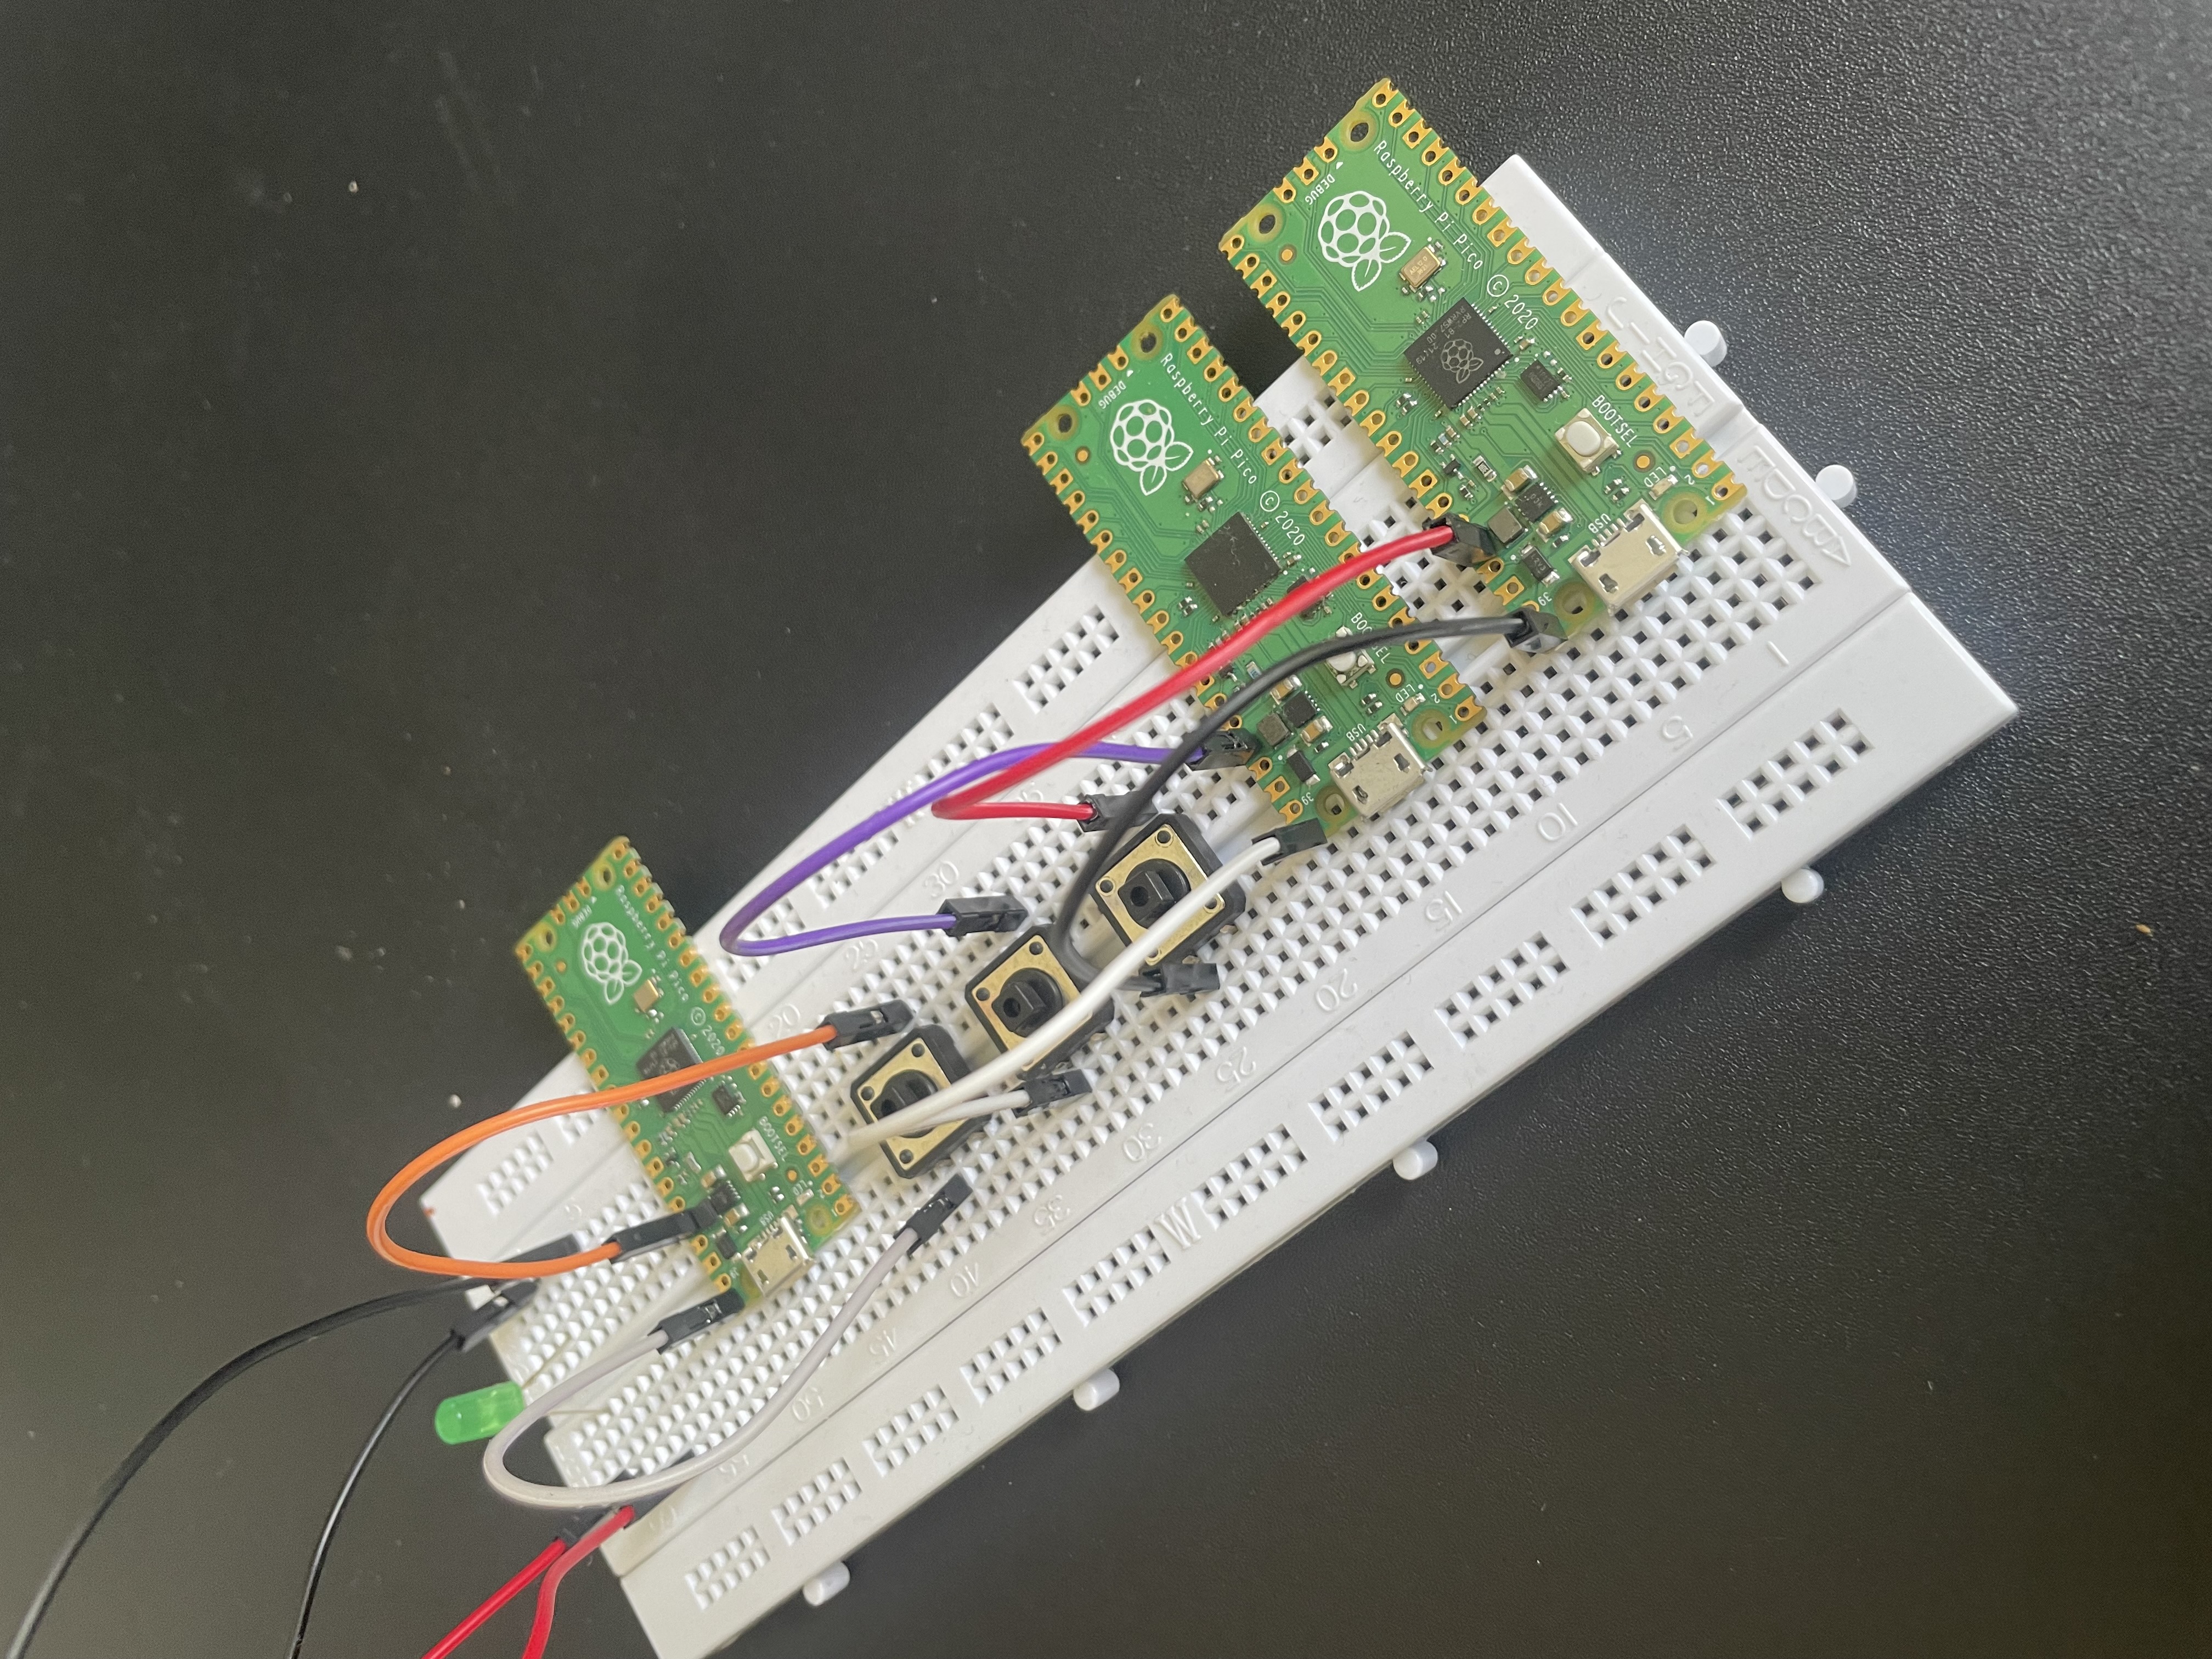
To create the first prototype, I started by setting up a few Raspberry Pi Picos on a breadboard. Each Pico was connected to a button, which would act as a simple input device. I connected each button to a GPIO pin on the Raspberry Pi Pico. The other side of the button was connected to the ground (GND). (Note: you should add a pull-up resistor.)
I wrote a simple CircuitPython script to detect button presses and send a corresponding keystroke to the master device. The script used the machine module to read the GPIO pin state and the usb_hid module by Adafruit to emulate a keyboard.
```python from machine import Pin import usb_hid from adafruit_hid.keyboard import Keyboard from adafruit_hid.keycode import Keycode
kbd = Keyboard(usb_hid.devices)
button = Pin(15, Pin.IN, Pin.PULL_UP)
while True: if not button.value(): # Button is pressed kbd.send(Keycode.ONE) # Send the 'A' key while not button.value(): pass # Wait for button release ```
This prototype allowed me to test the basic functionality and ensure that the buttons could reliably send signals to the master device (my PC).
I then 3D printed some enclosures, which ended up looking great after a few iterations. Then I wired everything up inside, which wasn't much because it was only a button and a Pico that had to be connected. Nevertheless, I still managed to burn some plastic.
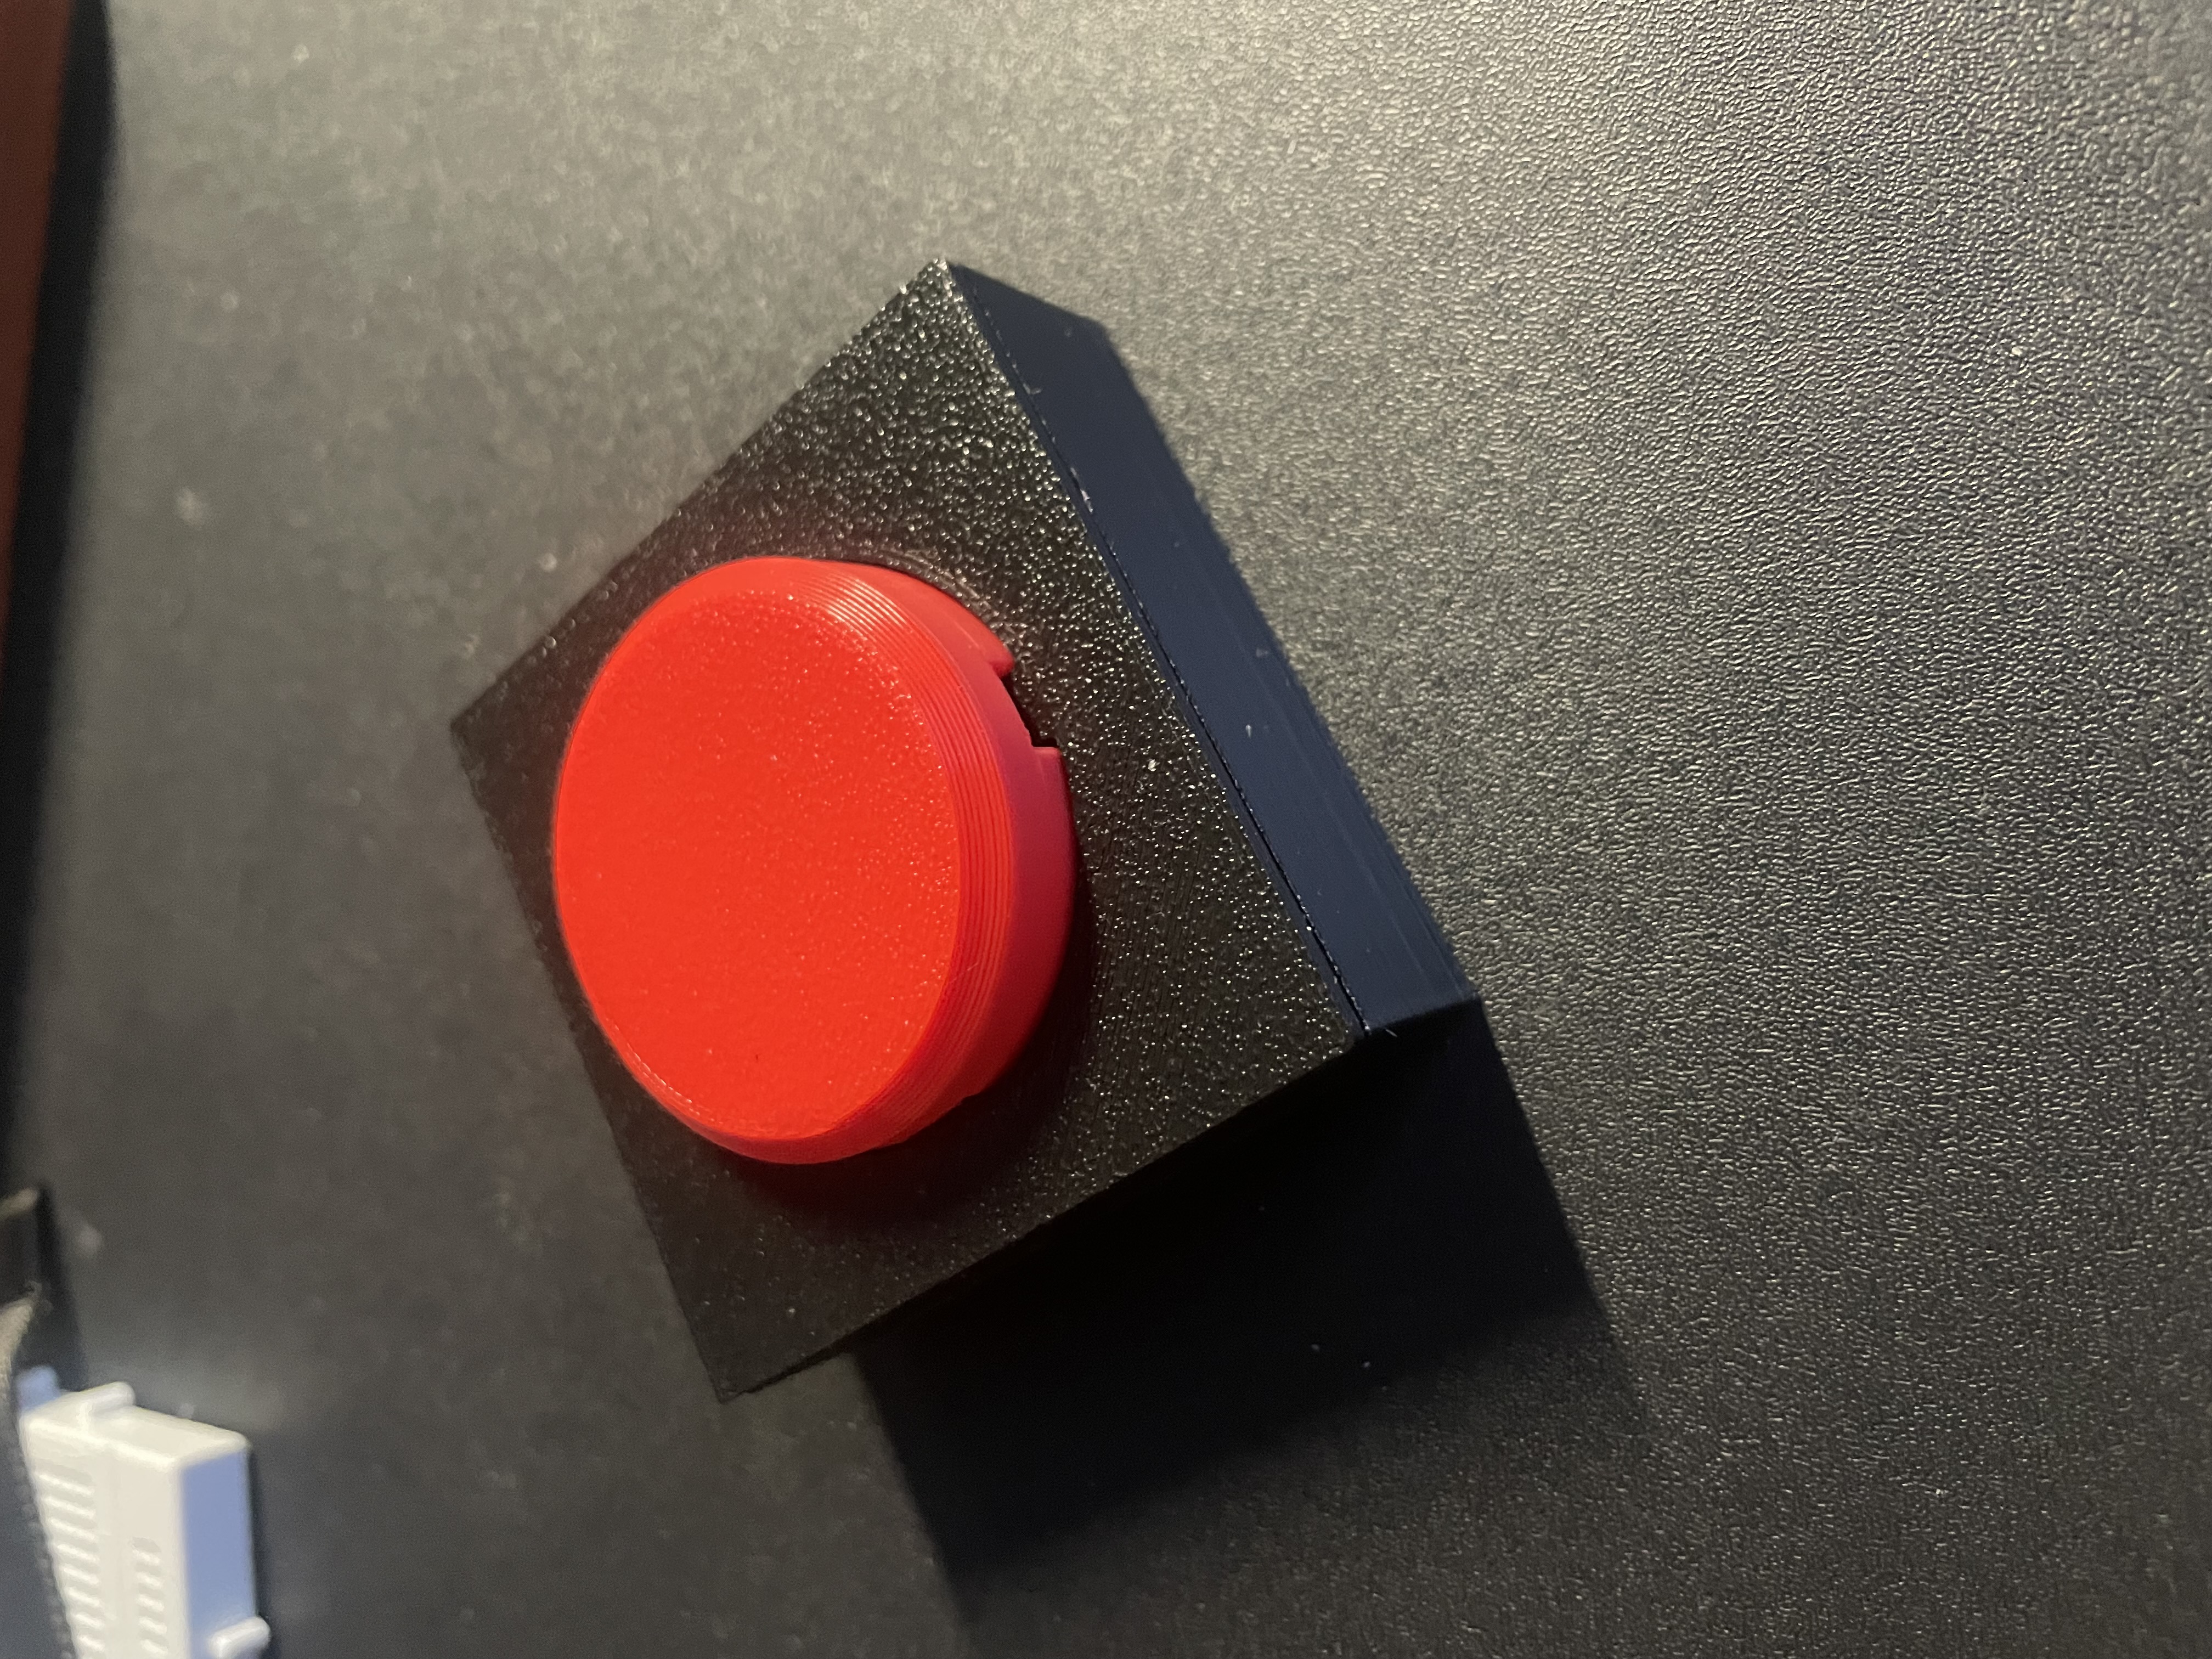
the final button ended up looking great.
The only thing thats missing now is the software that has to run on the "master". The NumberGameApp class initializes the main window with a title and minimum size, and sets up a variable selected_number to store the number of players, defaulting to 4. The create_widgets method creates the UI components, including a "Start" button to begin the game, a dropdown menu to select the number of players (1 to 8), a label to display the result (which player pressed their button first). The start_game method resets the result label and disables the dropdown and start button to await input. The on_key_press method handles key presses: if the spacebar is pressed, the game starts; if a number key (1 to the selected number of players) is pressed, it displays which player pressed their button first and re-enables the dropdown and start button.
```python import tkinter as tk from tkinter import ttk import webbrowser
class NumberGameApp: def init(self, root): self.root = root self.root.title("Number Game") self.root.minsize(600, 400)
    self.selected_number = tk.IntVar()
    self.selected_number.set(4)

    self.create_widgets()

    self.root.bind("<KeyPress>", self.on_key_press)
    self.awaiting_input = False

def create_widgets(self):
    self.button = tk.Button(self.root, text="Start", command=self.start_game)
    self.button.pack(pady=10)

    self.dropdown_label = tk.Label(self.root, text="Number of Players:")
    self.dropdown_label.pack(pady=5)

    self.dropdown = ttk.Combobox(self.root, textvariable=self.selected_number, values=list(range(1, 9)), state="readonly")
    self.dropdown.pack(pady=10)

    self.result_label = tk.Label(self.root, text="", font=("Helvetica", 48, "bold"))
    self.result_label.pack(pady=20)

    self.link_label = tk.Label(self.root, text="kowal.dk", fg="blue", cursor="hand2")
    self.link_label.pack(side="bottom", pady=10)
    self.link_label.bind("<Button-1>", lambda e: webbrowser.open_new("https://www.kowal.dk"))

def start_game(self):
    if not self.awaiting_input:
        self.result_label.config(text="")
        self.awaiting_input = True
        self.dropdown.config(state="disabled")
        self.button.config(state="disabled")

def on_key_press(self, event):
    if event.keysym == "space":
        self.start_game()
    elif self.awaiting_input:
        try:
            pressed_number = int(event.char)
            if 1 <= pressed_number <= self.selected_number.get():
                self.result_label.config(text=" Player "+str(pressed_number))
                self.awaiting_input = False
                self.dropdown.config(state="readonly")
                self.button.config(state="normal")
        except ValueError:
            pass
if name == "main": root = tk.Tk() app = NumberGameApp(root) root.mainloop()
```
By making that, the project was now complete!
The buttons worked perfectly, and with the use of a USB splitter, I was able to get 8 of them working.